
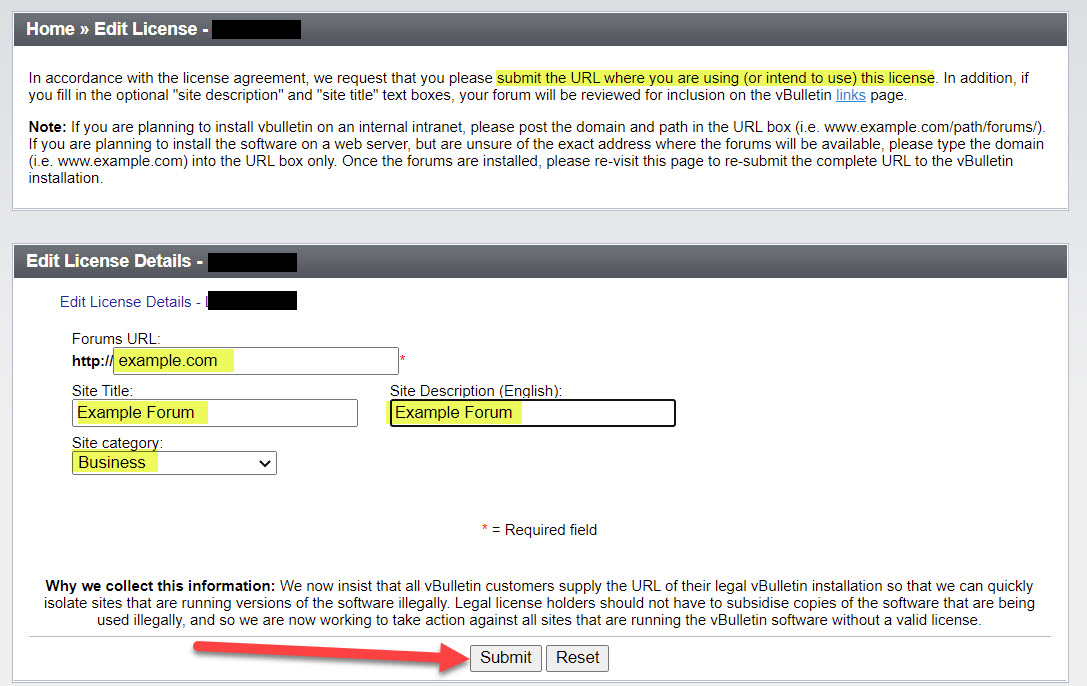
Before installing vBulletin, you need to login to the members area at https://vbulletin.com and edit your license. The main thing is to set your correct forum URL. After submitting, you can download the forum files, then unzip them.
Next step is to upload the files to your server. This takes a little time, so I recommend going ahead and uploading the files while you create your database.
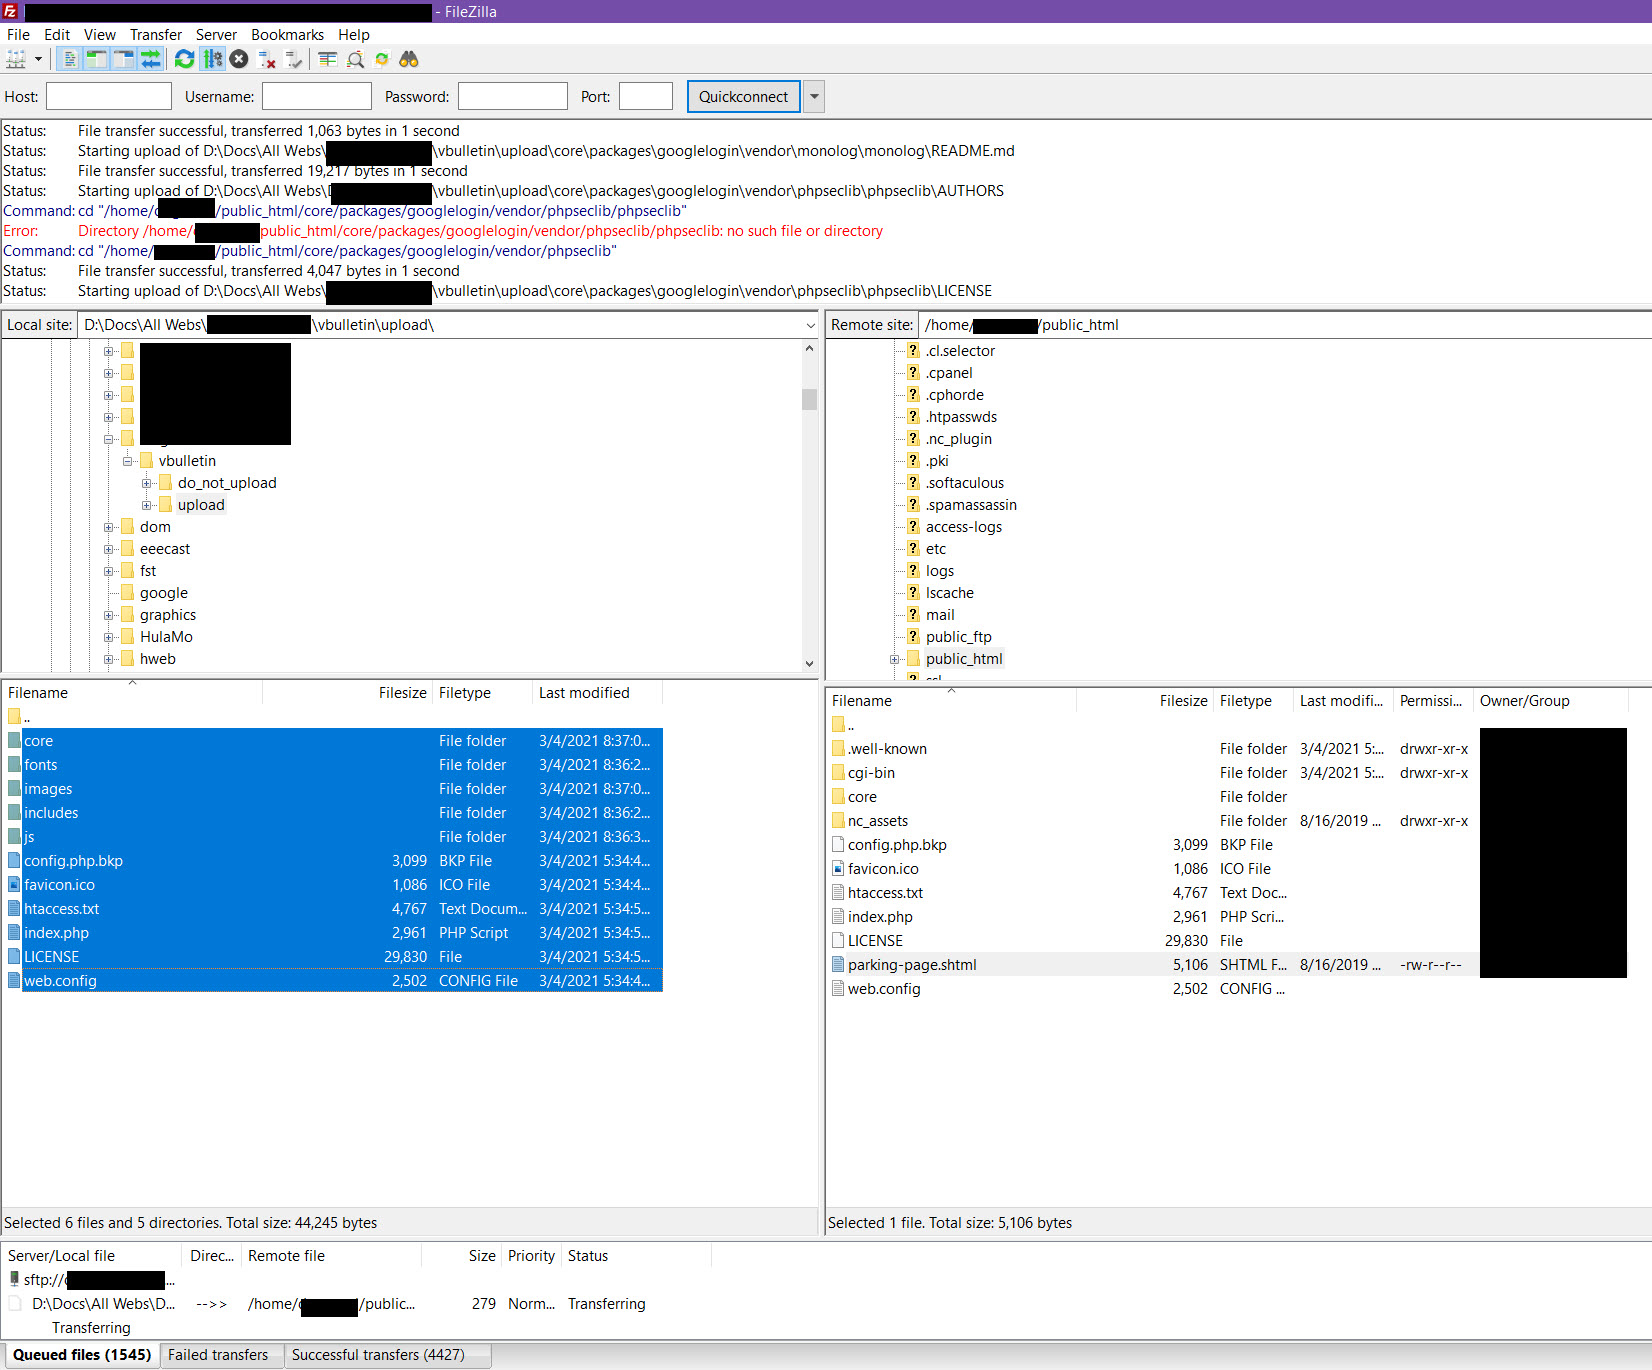
Use an FTP program such as FileZilla to upload the files from the vbulletin/upload folder to the folder on your server. In this example, we are uploading to the root public_html folder. If you are using a CMS such as WordPress in your root folder, you can create a subfolder and upload to it. Call it something appropriate for your forum. Forum is fine, but you can also use words like community, support, or club. Ideally you want a word that not only works for those people using your vBulletin forum, but also works as a good SEO keyword to help bring people to your site.
Make sure the path you set for your forum in the vBulletin members area matches exactly the path you are uploading to. If they do not match, go back and edit to make it match. This will prevent you from having any licensing issues.
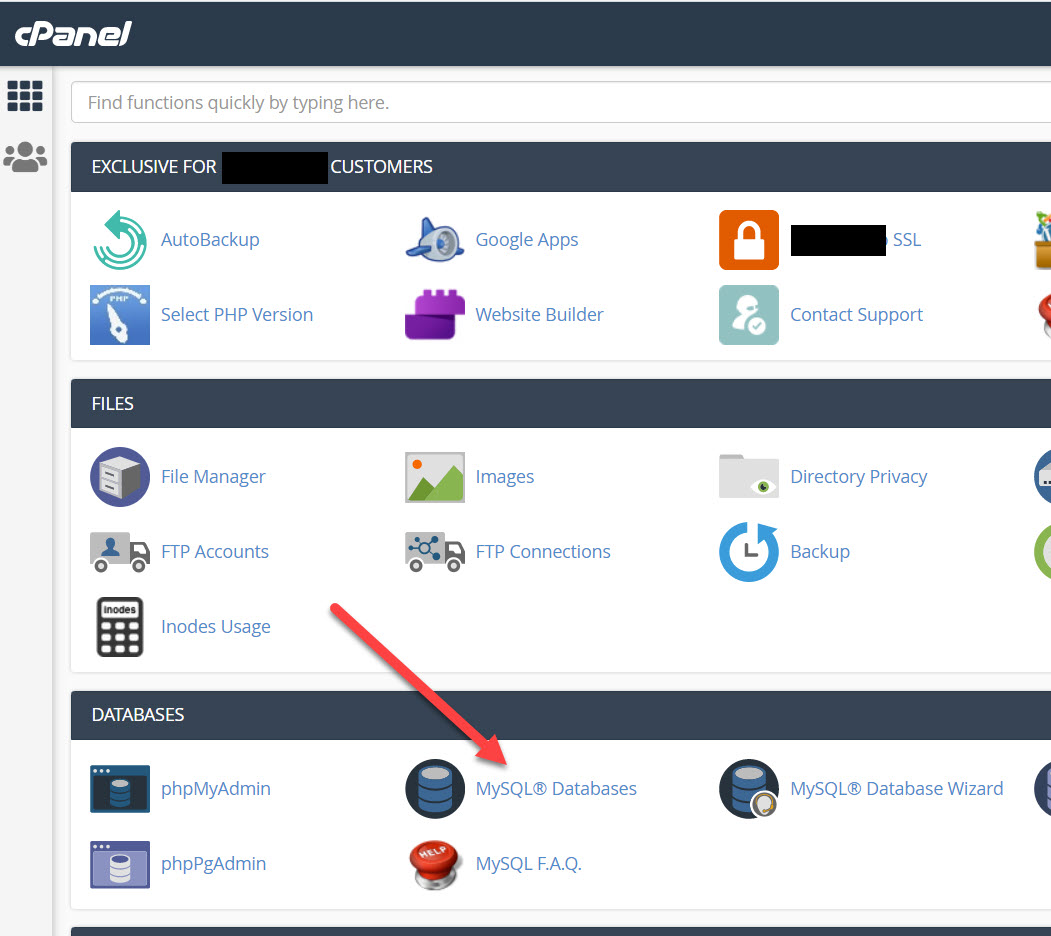
While your files are uploading, log into cPanel, go to the DATABASES section and open MySQL Databases.
NOTE: If you do not have cPanel access, you will need to have the person who manages your domain setup the database for you. Have them provide you with the database name, database username, and password, and skip down to the file prep section, starting with editing your .htacess file.
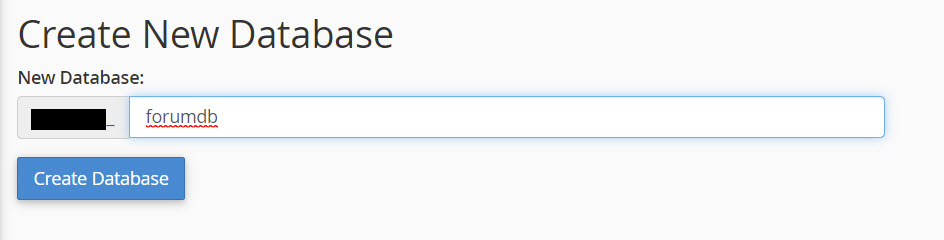
Create a database to hold your vBulletin
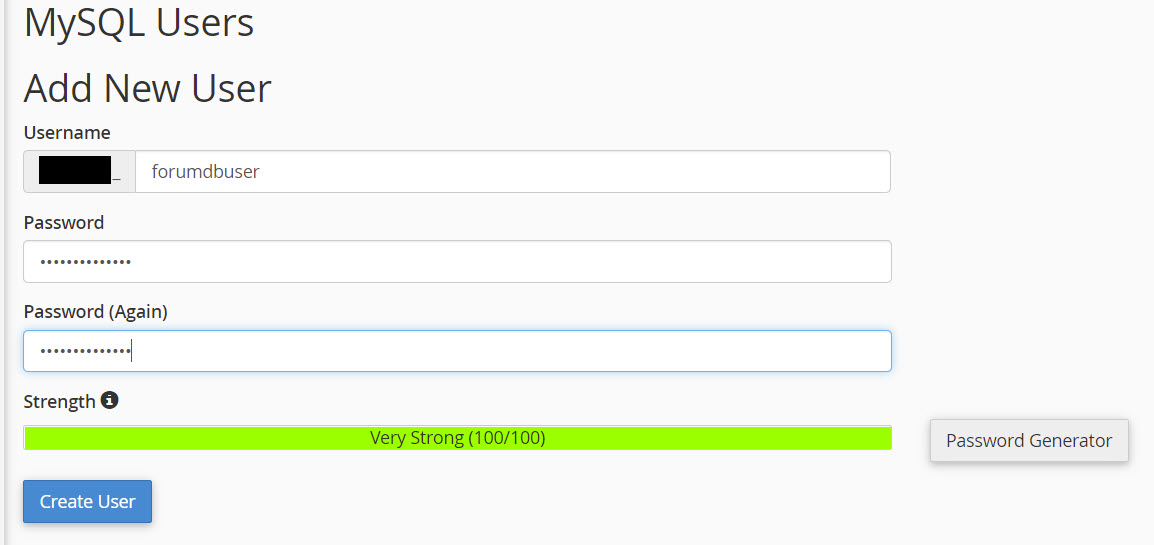
Create a user for your database and give it a very strong password that you do not use anywhere else. There is a password generator available if you have trouble coming up with your own.
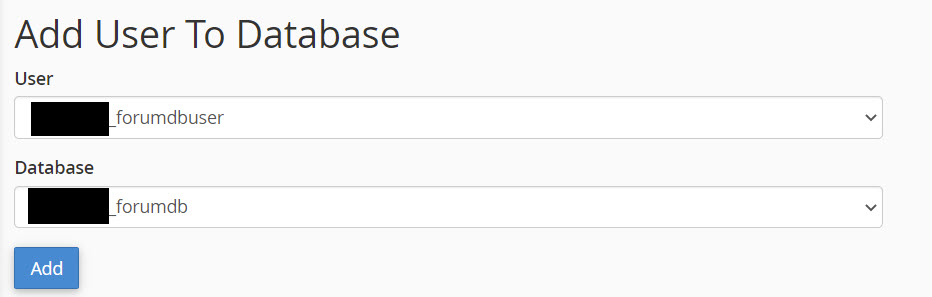
Add that user to the database you just created.
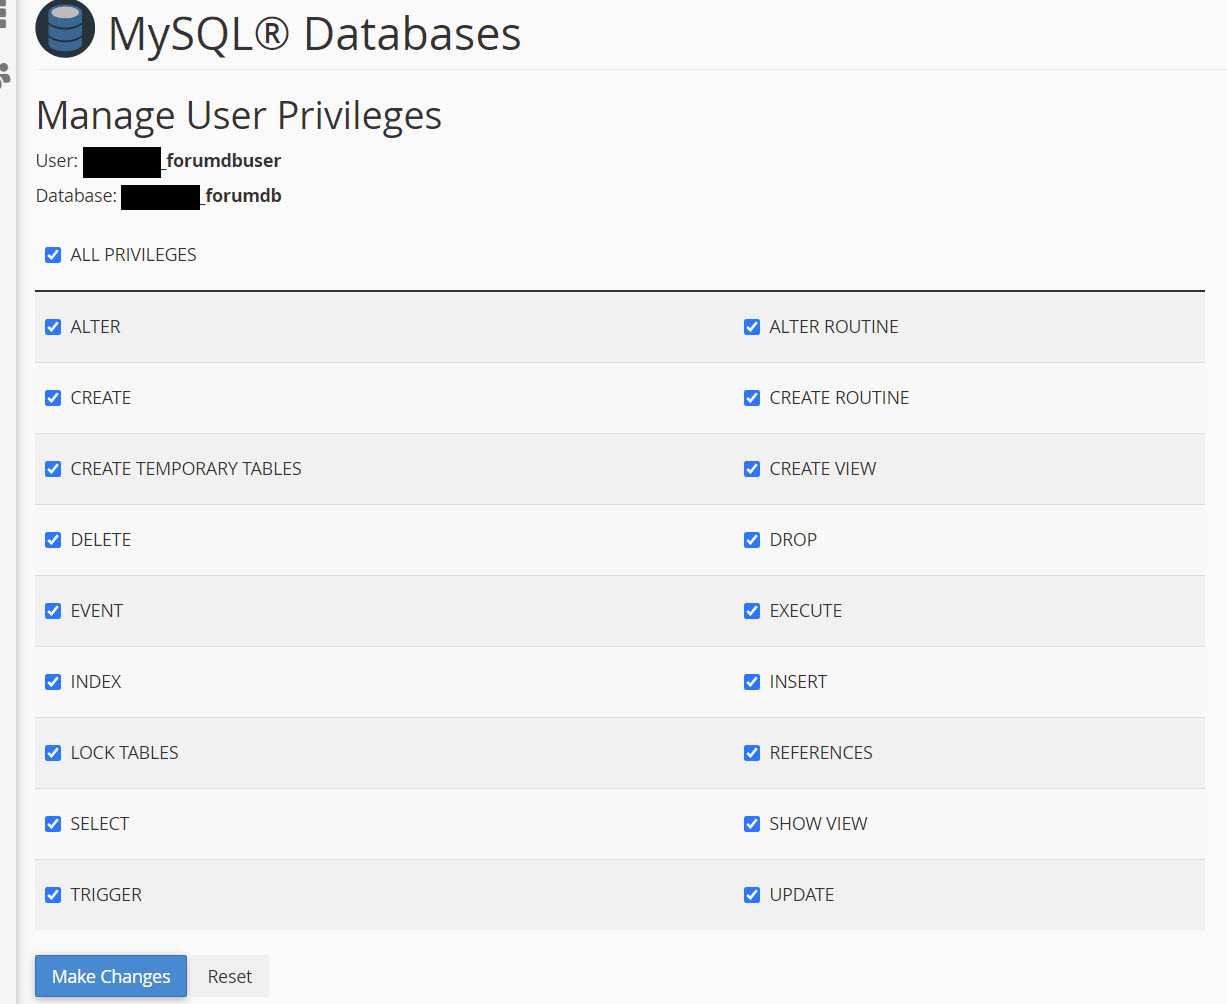
Grant all database privileges to the user you just added to the database.
Now your database is ready. Once your files have completed uploading, you can start editing your configuration files to prep them for the installation.
First up, in the root directory of your forum, rename the “htacess.txt” file to “.htaccess” and “config.php.bkp” to “config.php”.
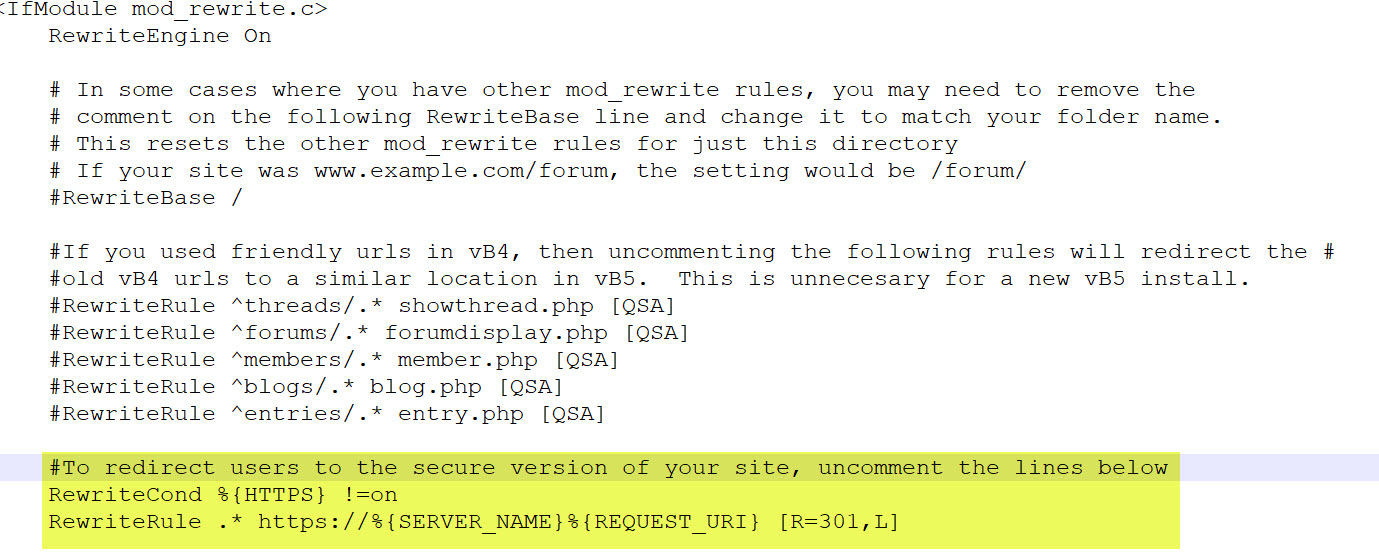
If your site uses SSL, which it should, edit the file and remove the pound sign “#” to uncomment the two lines that will force page unsecure http requests to the secure https version of your site. It should look like the highlighted section above.
Do not edit the config.php file unless you are directed to by vBulletin support.
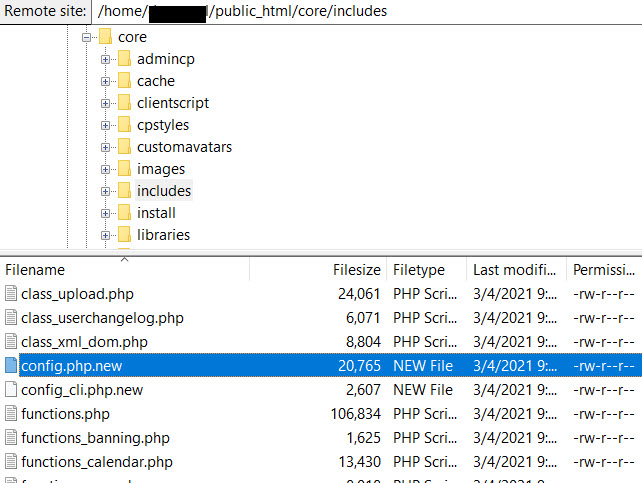
Go to the forumroot/core/includes folder and rename config.php.new to config.php. Edit this file and put in your database connection information.
You will need to edit each config line with the correct information for your database and server.
ONLY EDIT BETWEEN THE SINGLE QUOTES!!!
DO NOT REMOVE THE SINGLE QUOTES!!!
This is all the editing needed for a standard installation. You can look through the entire file to see if any other settings apply to your specific installation.
    //    ****** DATABASE NAME ******
$config['Database']['dbname'] = 'forumdb';
    //    ****** TABLE PREFIX ******
$config['Database']['tableprefix'] = 'vb_';
    //    ****** TECHNICAL EMAIL ADDRESS ******
$config['Database']['technicalemail'] = '[email protected]';
    //    ****** MASTER DATABASE SERVER NAME AND PORT ******
$config['MasterServer']['servername'] = 'localhost';
$config['MasterServer']['port'] = 3306;
    //    ****** MASTER DATABASE USERNAME & PASSWORD ******
$config['MasterServer']['username'] = 'forumdbuser';
$config['MasterServer']['password'] = 'Your-Very-Strong-Password!';
    //    ******** FULL PATH TO FORUMS DIRECTORY ******
$config['Misc']['forumpath'] = '/home/yourpath/public_html';
Once you finish editing, make sure you keep a backup copy of the edited files on your PC.
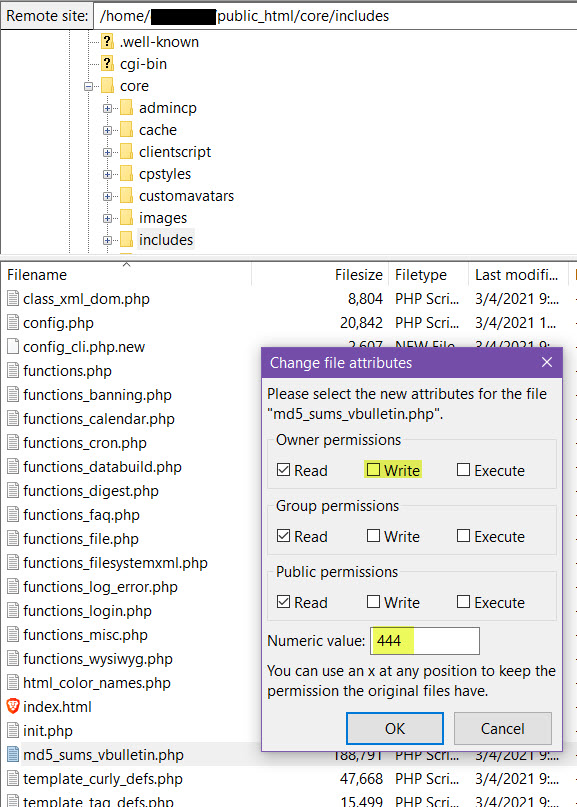
Go to your forumroot/core/includes folder and change the permissions on your md5_sums_vbulletin.php folder to 444, removing all write access to it. This can be done many ways through your cPanel. In the example below, I am using FileZilla to change permissions.
At this point, you have completed the pre-installation preparation for your new forum. In part two, we will complete the installation.