
In this example I setup Hyper-V on Windows 8.1. The steps are same to create a Hyper-V Windows server.
Prerequisites:
Host machine with Hyper-V installed and a network card configured.
An .ISO file of your installation media.
You need a fast hard drive for your VM. I recommend a minimum of 7200 rpm drive, but an SSD will perform much better.
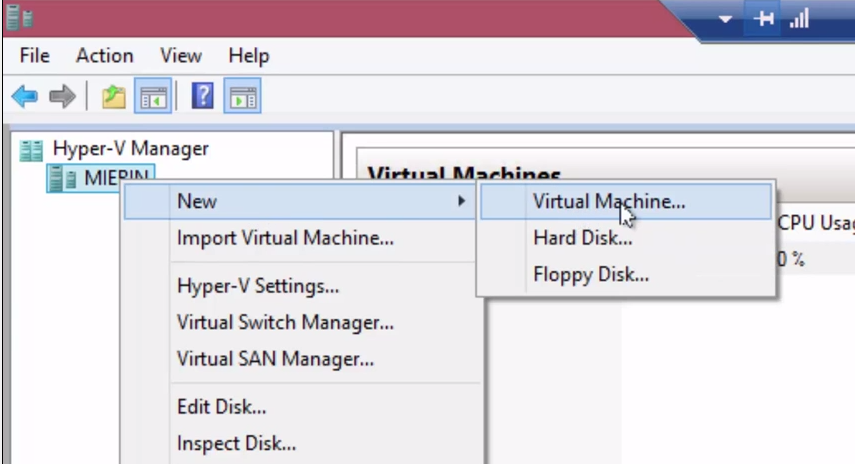
- Launch Hyper-V, right-click the server name, and create a new VM.
- Give your VM the same name you are going to name your workstation (or server).
- Select generation 2 if you will be installing Windows 8 or higher, or Server 2012 or higher
- Set startup memory (I recommend 2048) and select dynamic memory
- Configure networking by choosing your existing network connection
- Select the size and location of your Hyper-V hard drive. Put it on the fastest drive you can.
- Set the path to the .iso installation media
- Verify your options, then select Finish.
- Right click to connect and start your Hyper-V
- Press a key to boot from your ISO file when prompted to boot from CD or DVD
- Run the windows installation routine
- Name your computer the same name as your VM
- When prompted, select “Create a new account” then “Sign in without a Microsoft Account.” I highly recommend you do not use a Microsoft account to sign into your computer with. If anything happens to your Microsoft Account, you may not be able to access your computer.
- Complete your OS installation
Once you are up and running, you should be able to access the internet. If you want to use DHCP on this computer, be sure and turn off the firewall for the private network on your VM.