This is part one of a three-part series covering installation of Windows Server 2019 Active Directory in a Hyper-V virtual machine. Part one covers configuring the virtual machine. Part two covers installing Windows Server. Part three covers installing Active Directory.
These installation instructions are focused on installing AD and assume you already have Hyper-V setup and configured for both networking and storage. You should have these things ready:
- Windows 2019 Server .iso file
- Either an activation key or a KMS server on your network
- At least 2GB Ram available for your Hyper-V server
- At least 64 GB disk space available for your Hyper-V disk
- A static IP address
- A computer configured with NTP or another NTP source accessible to your Hyper-V domain controller (See Configure NTP Server on Windows 10 Client or Windows Server 2019 if you need assistance setting an NTP server)
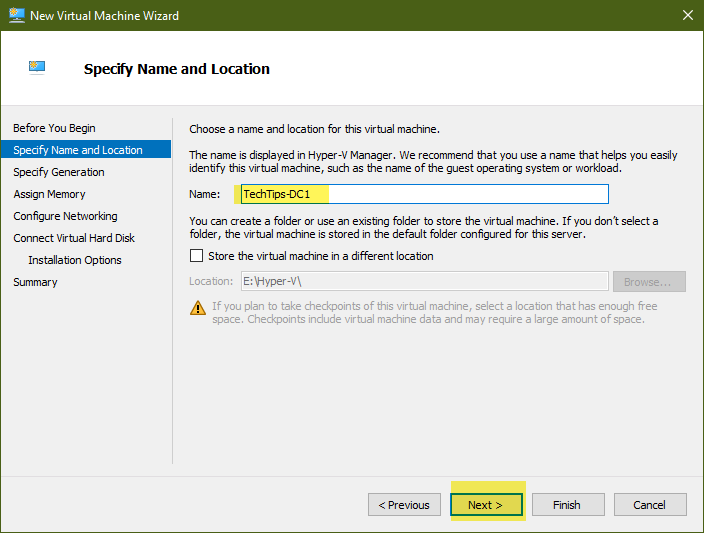
Launch Hyper-V Manager and run the create Hyper-V wizard. Name your hyper-v something that tells you what machine it is. I recommend the same name you are going to give your server.
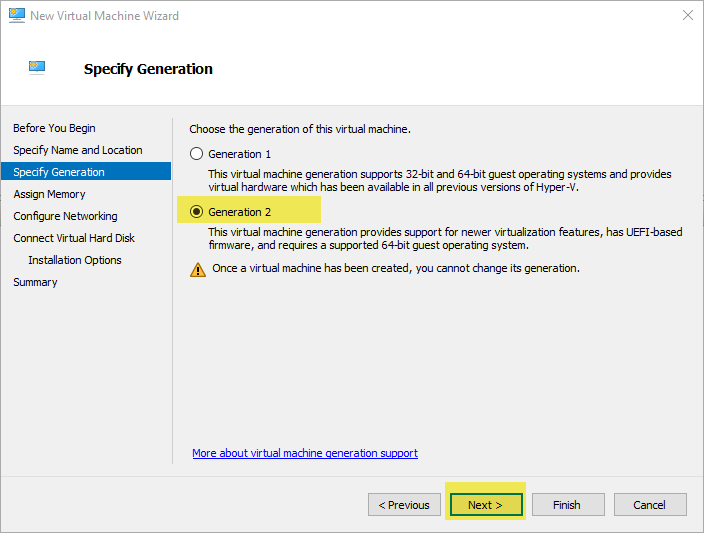
Set the proper Generation. If you are on modern hardware with a 64 bit OS, choose Generation 2.
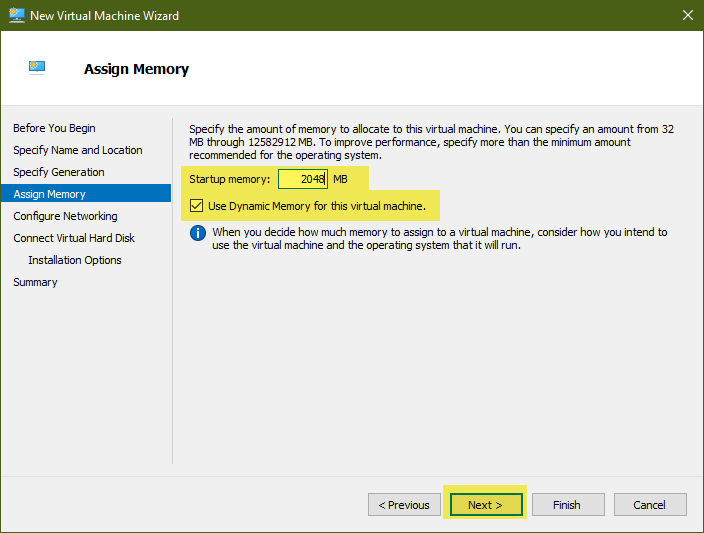
Set memory. The technical minimum requirement is 512MB, but 4GB is more reasonable. It depends on how large your Active Directory .dit file will be, how many logons you process, if any other services will be installed such as DNS, etc. As a general rule, I would not recommend going below 2GB, which is what I am setting for this demo. Dynamic memory is fine to use for a domain controller, so leave it on unless you will be installing something that requires it be turned off.
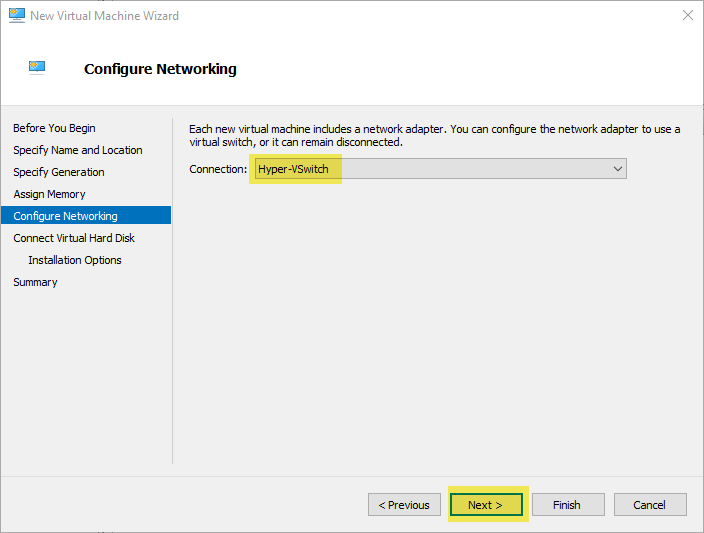
Select the switch you have setup for Hyper-V as your connection.
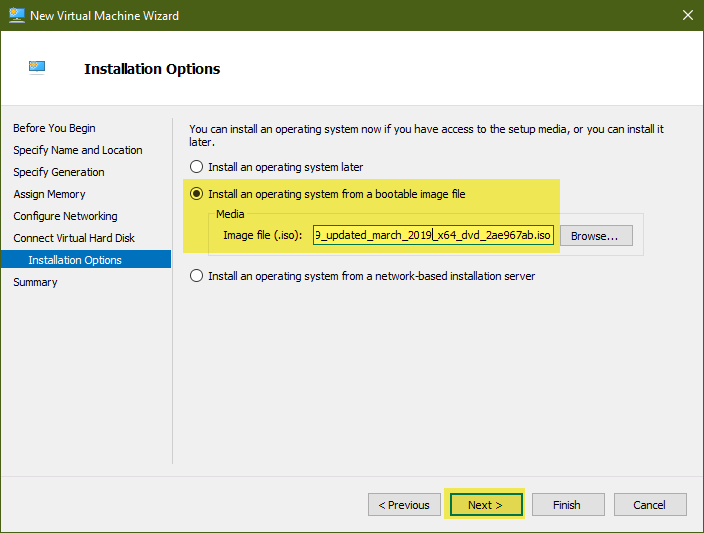
Add your virtual hard disk
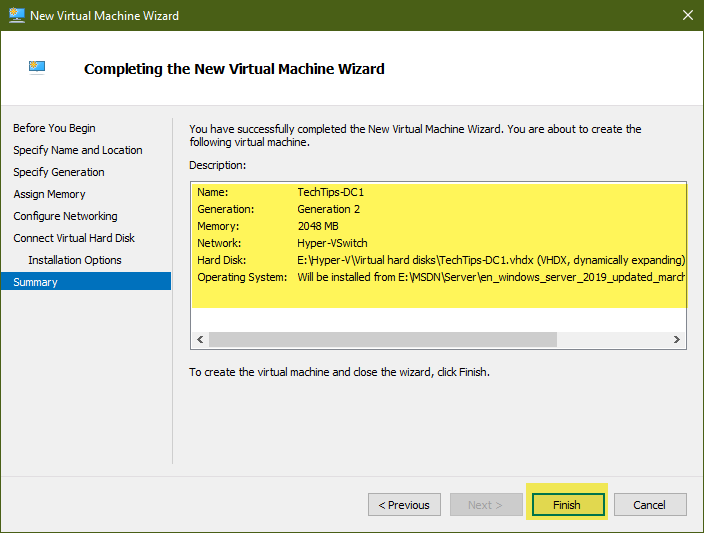
Verify the information is correct on the summary, then select “Finish” to create your Hyper-V virtual machine
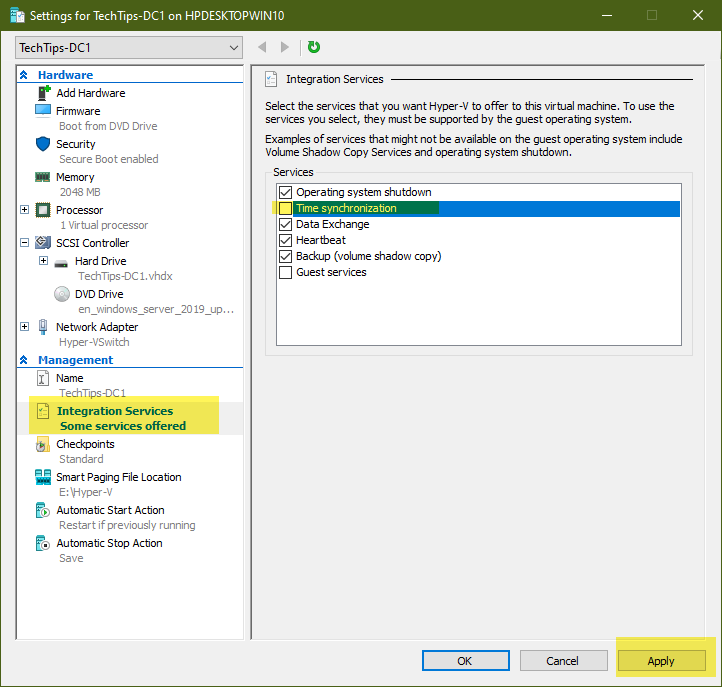
Disable time synchronization in Hyper-V. This will prevent your domain controller from using your Hyper-V host as its time source. You will configure the correct time source for your domain controller after installing Windows Server 2019.
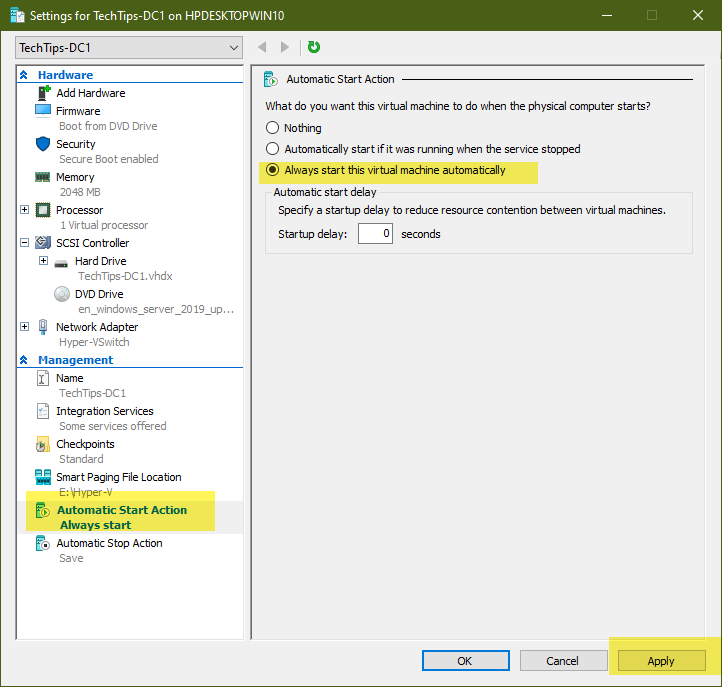
Change the Automatic Start Action to “Always start this virtual machine automatically. Your domain controller is one of your most critical servers. You need to make sure it is up and running without delay.
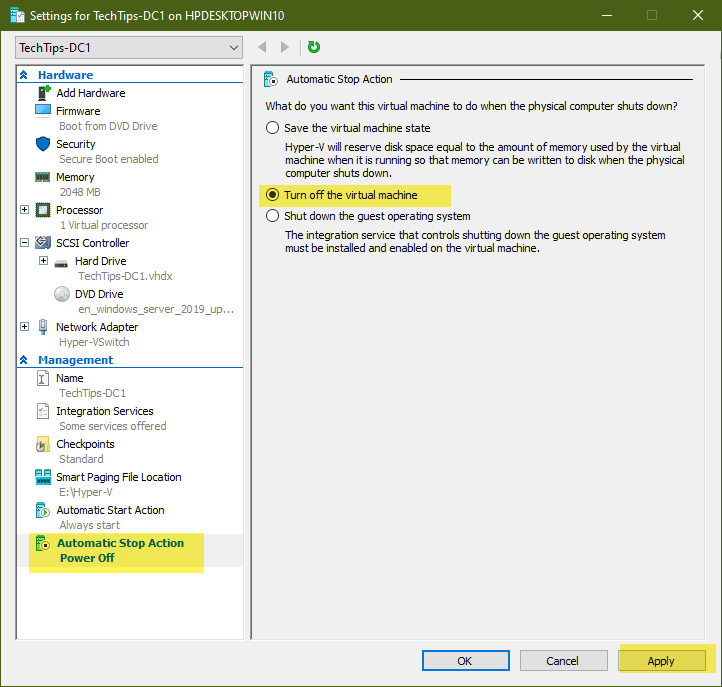
Change the Automatic Stop Action to “Shut down the guest operating system.” Using the default stop action of “Save the virtual machine state” can cause problems with your domain, potentially irreversible problems, when the domain controller is brought back up.
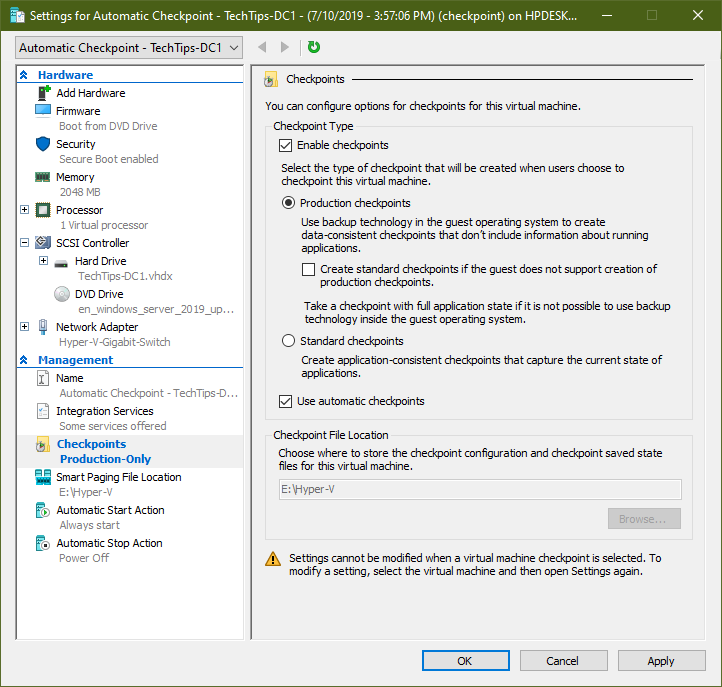
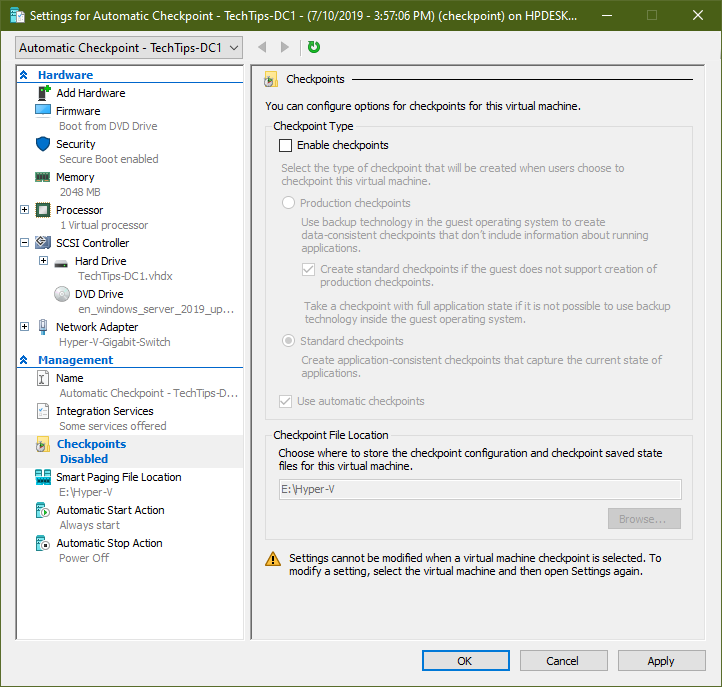
Check points. If they are not required by your backup software, turn them off. If your backup software does require check points, then set it to production checkpoints.