
This is part 3, the final part of a 3 part series in setting up a new Windows 2019 server in Hyper-V and installing a new active directory forest. In part 3, we will install and configure Active Directory.
You can access part 1 Setup and Configure Hyper-V here and part 2 Install Windows Server here
I am starting with some notes and important prerequisites for AD installation. After this, you will find my usual step-by-step instructions with screenshots along the way.
Active Directory for Windows Server 2019 is version 89. While this is higher than version 87 in AD 2016, this is the first AD version that does not also raise the functional level of the domain. In fact, there is only one attribute added to Active Directory: ms-DS-Preferred-Data-Location.
A little detail: The ms-DS-Preferred-Data-Location attribute is used to configure the preferred data location in Azure AD Connect sync for a specific user to designate the geo-location of the user’s Office 365 data, such as their mailbox, one drive files, SharePoint, and O365 groups. Note that Multi-Geo is currently only available to customers with a minimum of 500 Office 365 Services subscriptions.
Naming your active directory during installation is extremely important. You must get it right the first time. Changing the name of your AD is extremely difficult. In some scenarios, such as with an on-premises Exchange server, you may not ever be able to change it.
Determine your name settings for Active Directory (AD), the NetBIOS name, and the User Principal Name (UPN). This is what I recommend you use for these settings, which will make it easy on your users and allow for easy integration with Office 365:
- Active Directory forest root domain name: Use a prefix of your company’s primary domain like ad or corp.
- Make it short and make it make sense. If your primary domain is example.com and you choose one of the two above, your AD root domain name would be ad.example.com or corp.example.com
- Your prefix is limited to a max of 15 characters, cannot be only numbers, and can only be composed of standard internet characters A-Z, a-z, and 0-9
- If your domain will consist of multiple companies, you may want to create an empty root domain name, then let each company have a subordinate domain so they will be peers to each other. For example, corp.example.com can be your empty root domain, then abc.corp.example.com and xyz.corp.example.com will be at the same level as each other. If you make your root domain abc.example.com, then add another domain, it will be xyz.abc.example.com and will give xyz the appearance of being suboridinate to abc.
- Don’t use a name that you might use to name a web server, or else requests for your web server may go to your AD server instead. Some obvious names to steer clear of are www and support, as www.example.com and support.example.com are commonly used web server names. If your business might use corp, as in corp.example.com, to reach your internal SharePoint, then don’t use it for your domain. Also, don’t use a name that you might use for an internal server like a domain controller.
- If your company’s name can be abbreviated AD, such as All Devices, then steer clear of using ad as your sub-domain as you might use that for a web server.
- If you are still uncertain what to name your AD to avoid conflicts, you could simply use activedirectory, naming your AD activedirectory.example.com
- NetBIOS name
- Your users will login to your AD using your NetBIOS name, followed by a backslash, followed by their login name.
- By default it is the same name as your AD sub-domain. I recommend you change this to something that makes more sense for logging in, like the name of your company, or the abbreviation for your company.
- Just like the active directory sub-domain name, make sure this isn’t a name you will use for a different server, like a web server or an internal domain controller.
- User Principal Name
- Best practice is to make your UPN the same as your user’s email address, even though it is not technically required.
- In some places where Office 365 wants users to type their UPN, it will ask them to type their email address. I assume this is because most users do not know or understand what their UPN is.
- If your UPN is different from your email address, there are places where Office 365 will have your users login twice, once with the O365 email address and once with the AD UPN.
Here’s a checklist of things you should have to get your installation started
- A domain name for your active directory. Ideally, this should match the name you will use for your Office 365 email.
- A windows 2019 server such as the one we configured in Hyper-V for parts one and two.
- The name you will use to name your server, such as dc or dc1
- A static IP address assigned to the server.
- If possible, a separate drive each for your active directory database and log files.
- The name you will use for your active directory, such as ad or activedirectory.
- The NetBios name you will use for your active directory.
- A password for Directory Services Restore Mode. This should be kept somewhere safe, such as a fireproof safe. Note this is tied to the local administrator account on this domain controller, so it is possible to have a different DSRM password on each domain controller. Make sure it meets the password complexity requirements of your local group policy.
- Login as an administrator
- Ensure your domain controller has Internet access
- Basic server setup checklist excluding any domain functions: https://techtips.tv/sql/checklist-for-configuring-a-windows-2019-server/
Add Active Directory
Login as an administrator
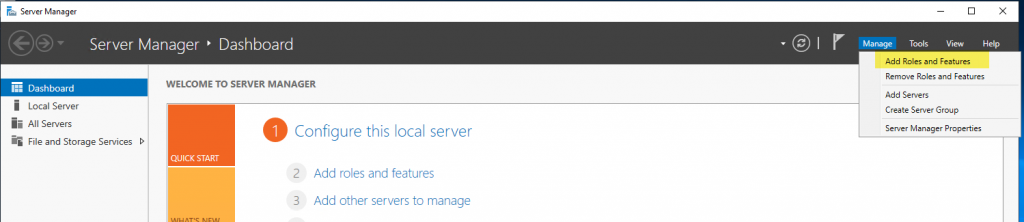
Launch Server Manager and select Manage / Add Roles and Features
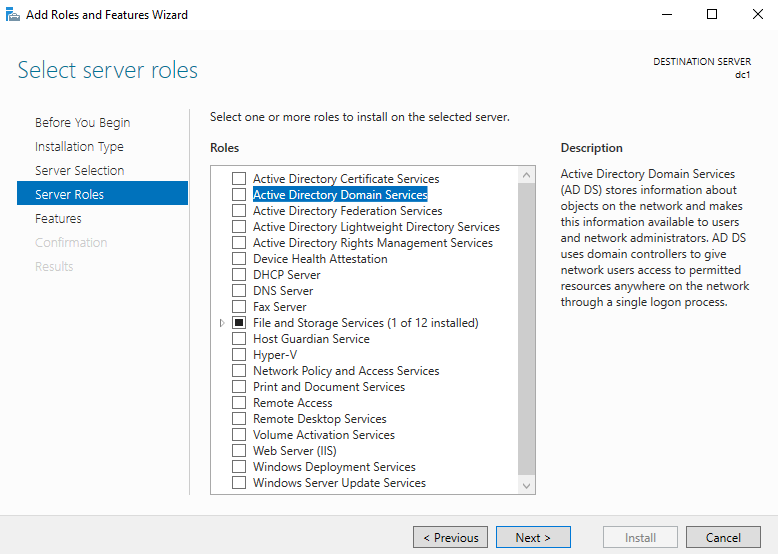
Accept defaults until you get to Server Roles, then select Active Directory Domain Services
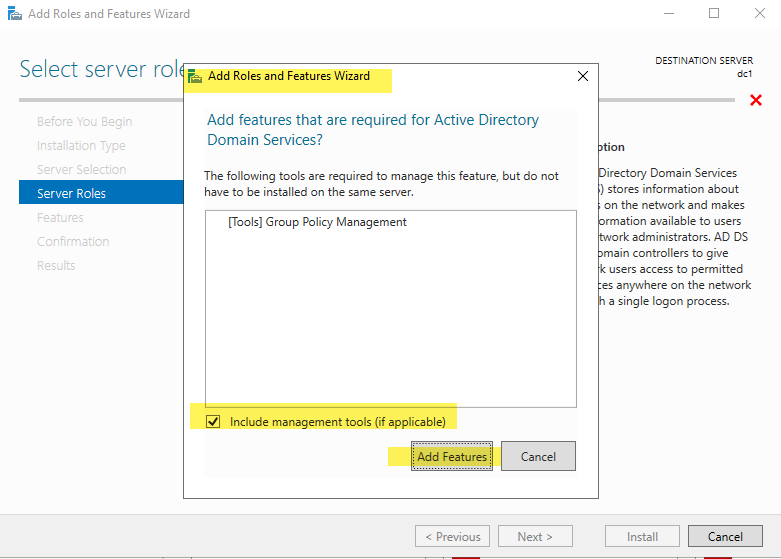
Add Tools for Group Policy Management and include the management tools. (NOTE: If you did not follow the server setup tasks, it will install the AD Tools and PowerShell modules in addition to Group Policy)
Add DNS Role
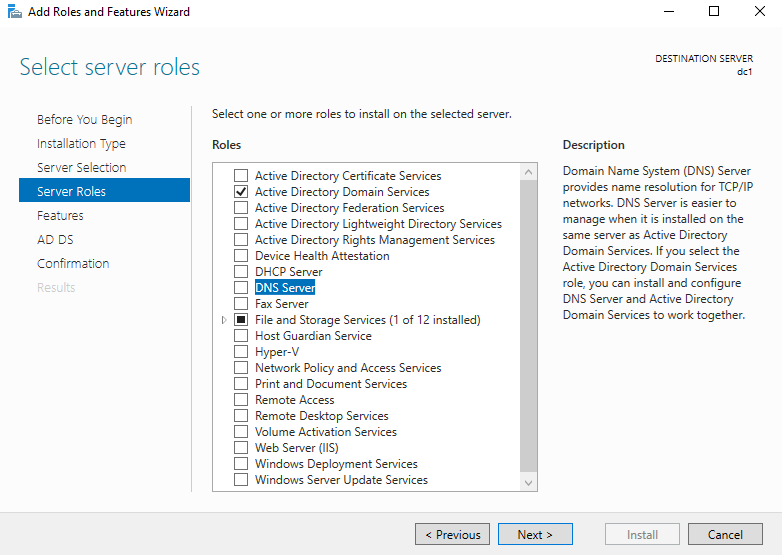
If you did not add the DNS tools earlier, you will add them now.
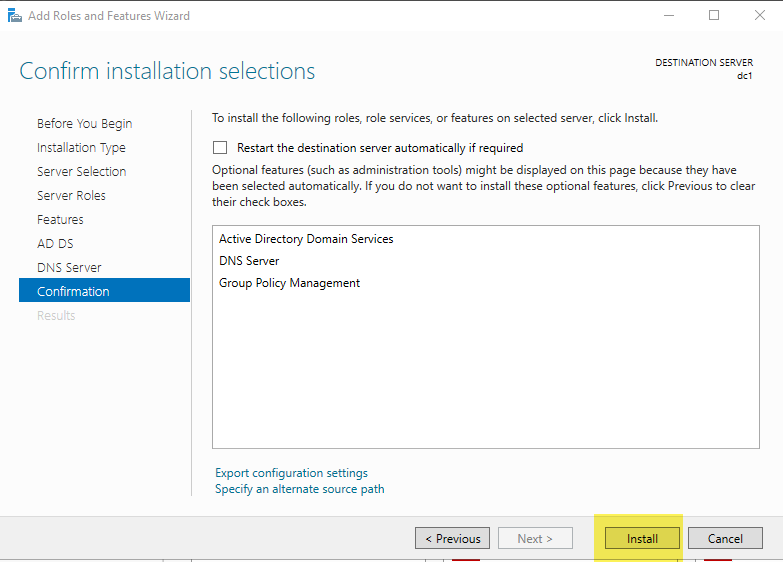
Next until Confirmation, then select Install
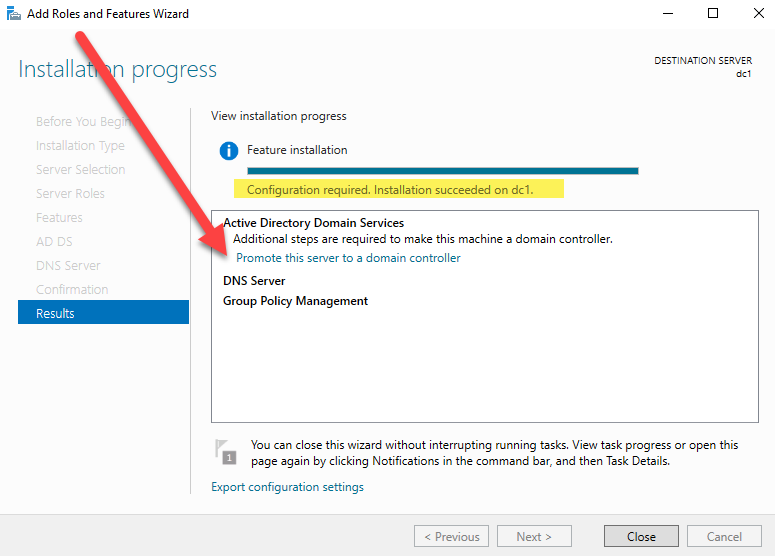
Don’t Close when complete!!!!
Once complete, select “Promote this server to a domain controller.”
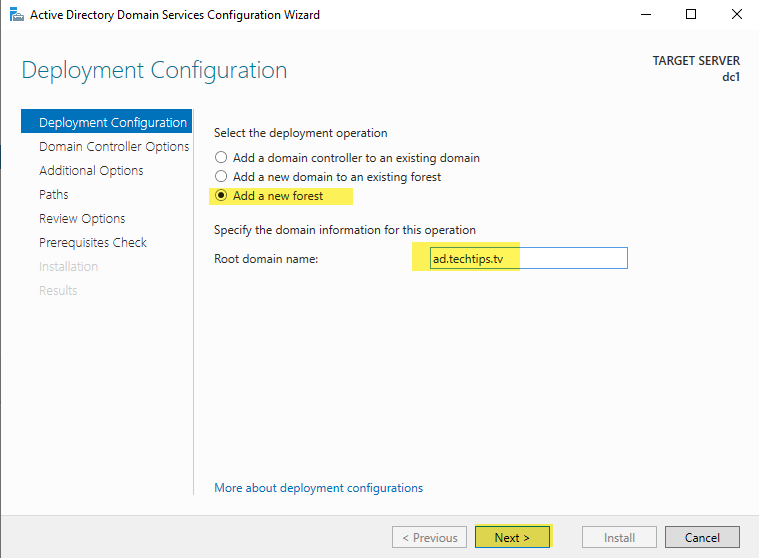
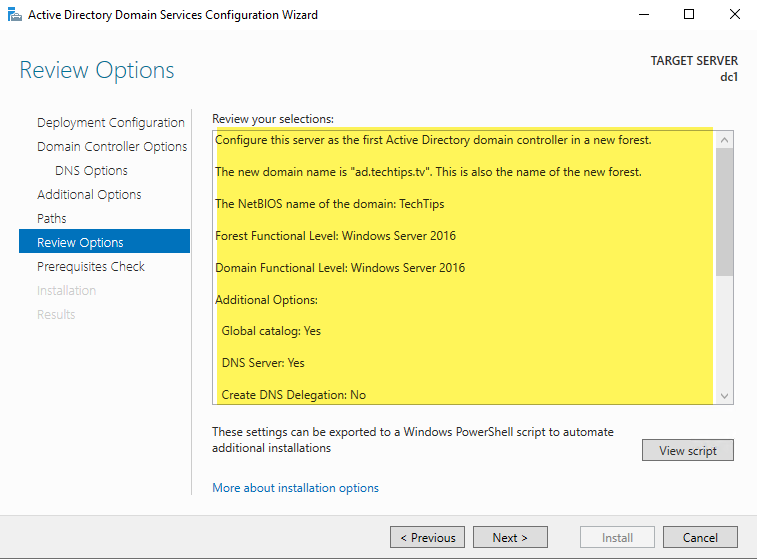
Since this is the first domain controller, we must select the third option, “Add a new forest.” Give it the root domain name you documented in your prerequisites. I am using ad as the subdomain for the root domain name, and using TechTips as the NetBIOS name.
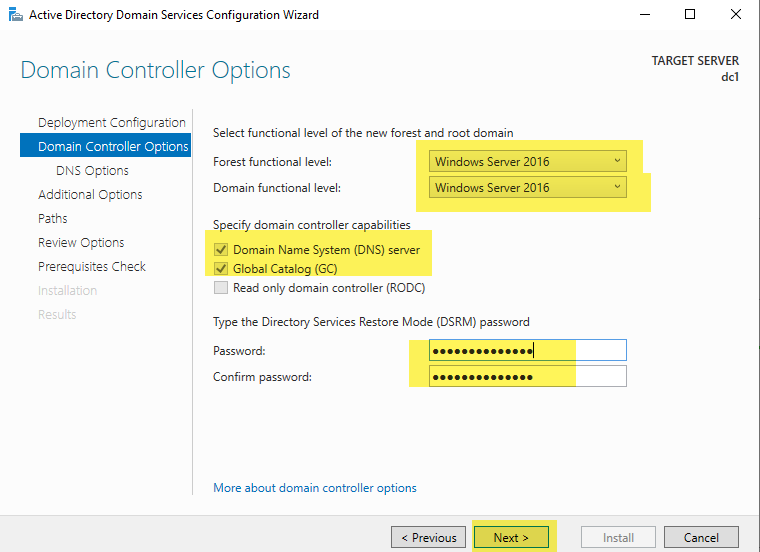
The forest and domain functional levels will be Windows Server 2016 as for the first time with server 2019, the level was not raised.
Leave the domain controller capabilities at default and set your Directory Services Restore Mode (DSRM) password to something that meets the requirements of your local group policy.
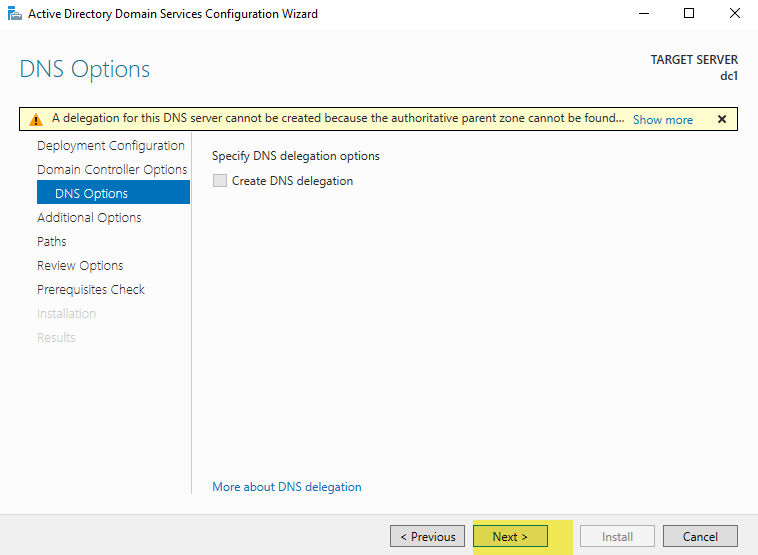
You will receive the warning, “A delegation for this DNS server cannot be created because the authoritative parent zone cannot be found.” This delegation warning is because DNS has not yet been setup, and it is normal. Ignore the warning and select Next.
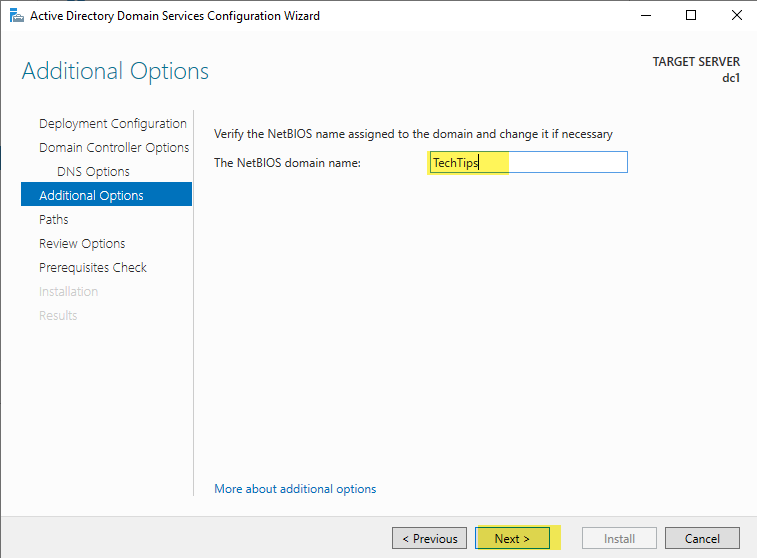
The NetBIOS name will default to the same name you used for your active directory root domain prefix. You should change this to the name you chose previously.
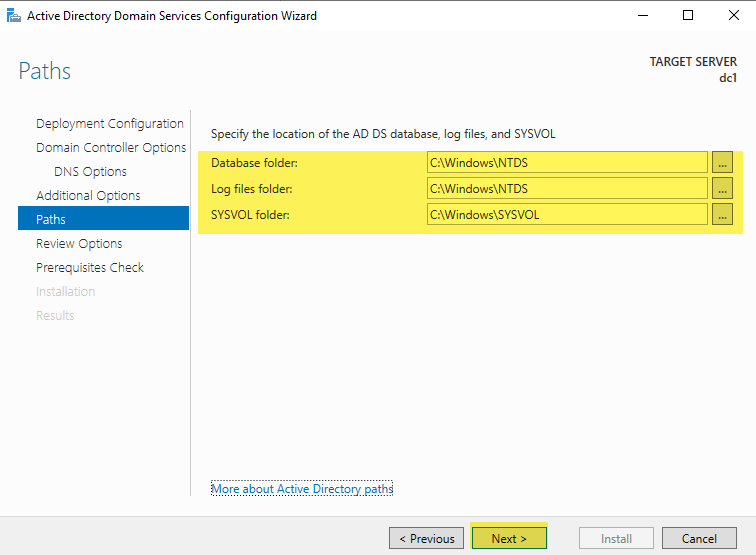
Leave the file locations at their default setting unless you have hardware specifically configured to put NTDS database and logs on different drives. This is recommended only if your active directory will receive frequent writes. Since the vast majority of AD transactions are reads, the default locations are fine for most AD installations.
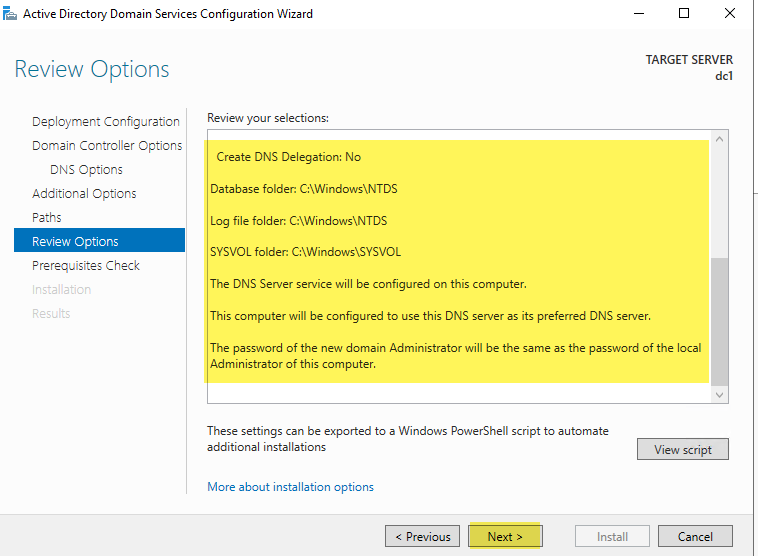
Scroll through and review your options. This is your chance to make any changes!
Select Next when you have confirmed all your choices are correct
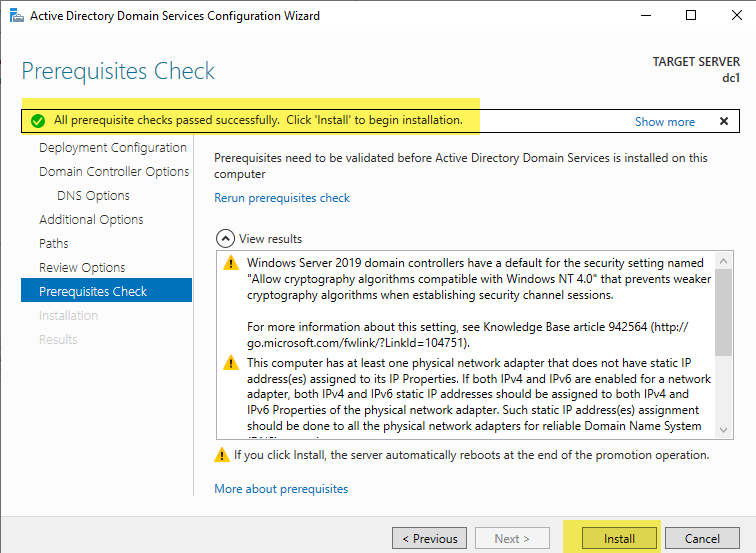
Prerequisites check – If everything passes, you will receive the success message near the top of the screen. Review any messages you receive under “view results” and once you are satisfied any messages have been addressed, select “Install.”
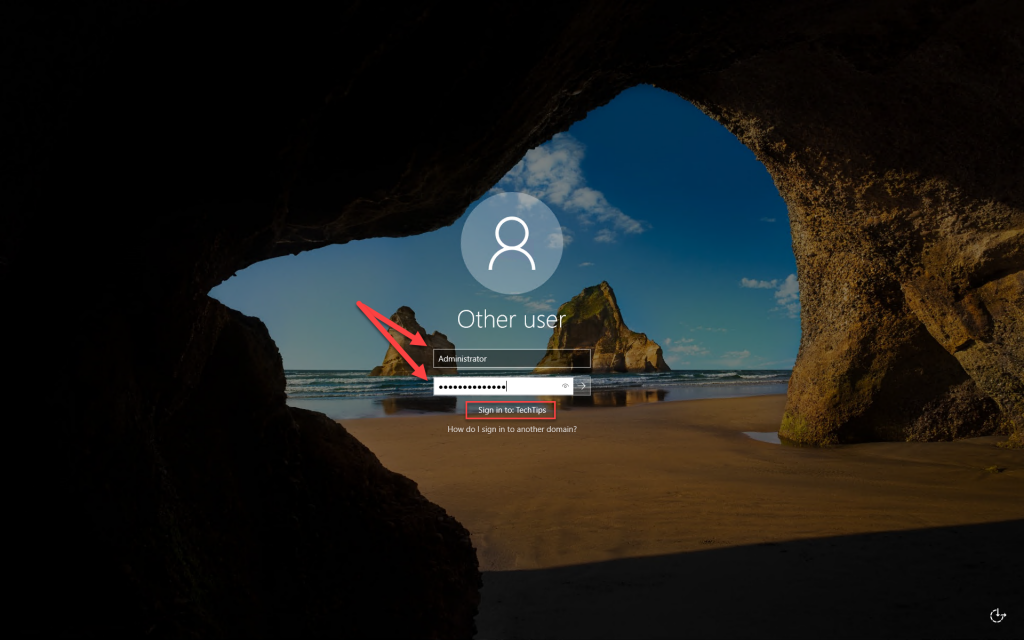
Once installation completes, your server will restart automatically. Sign in as Administrator using the password you supplied during installation. Your domain’s NetBIOS name should appear correctly under the password box.
If needed, change your screen resolution in display settings.
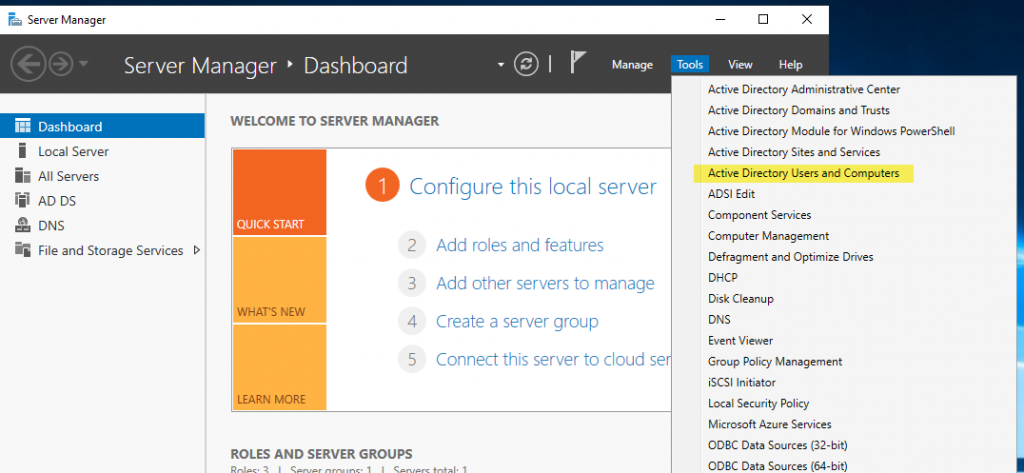
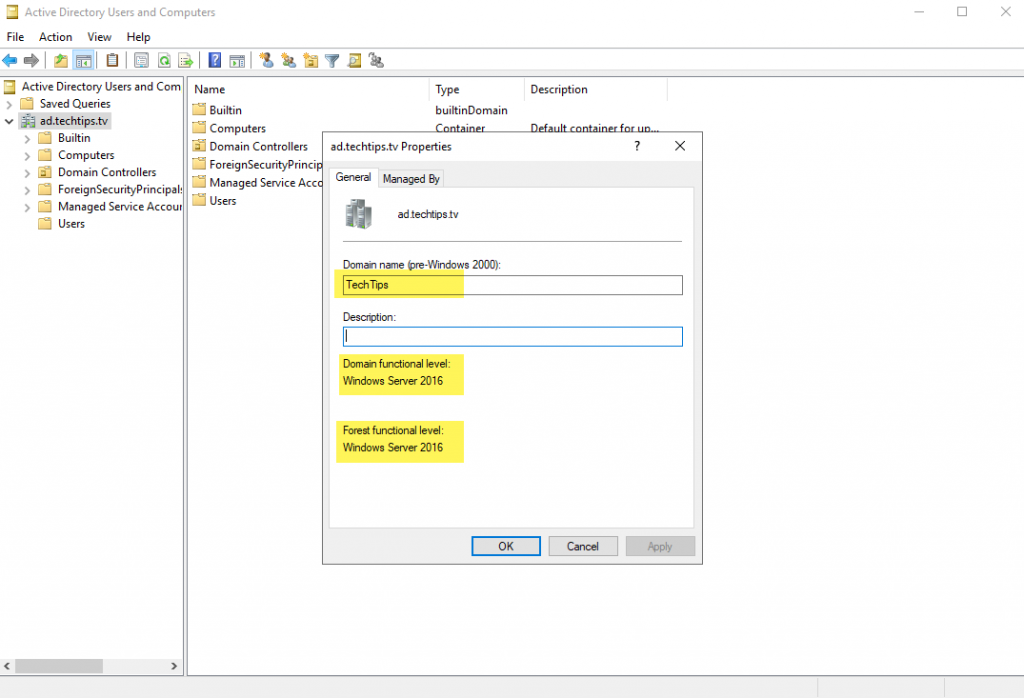
In Server Manager / Tools menu, launch Active Directory Users and Computers
Right-click your domain name and select properties to confirm the correct functional level of the forest and domain, and to confirm the correct NetBIOS name (Domain name (pre-Windows 2000)).
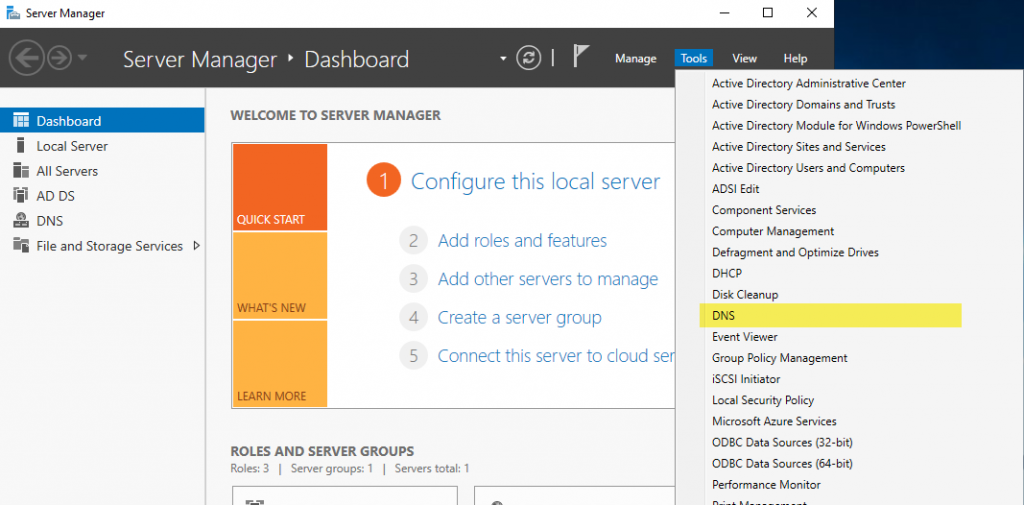
In Server Manager / Tools menu, launch DNS
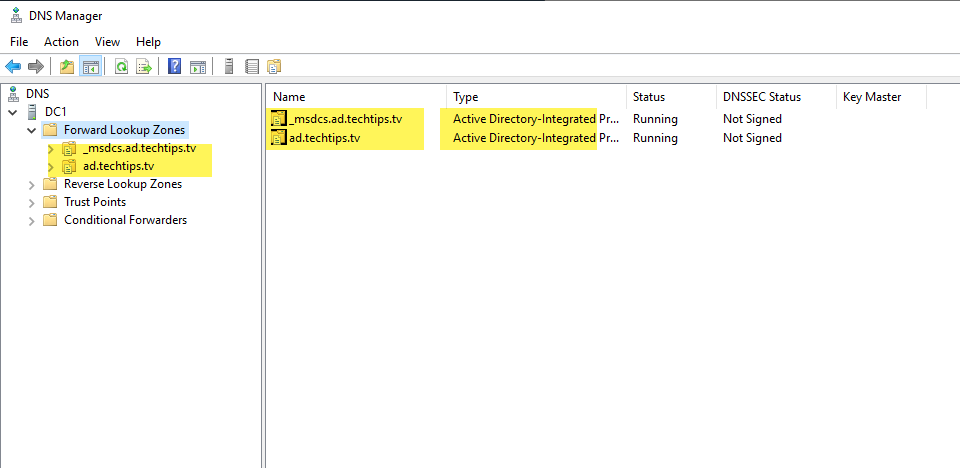
Confirm the two AD integrated DNS zones exist under “Forward Lookup Zones”
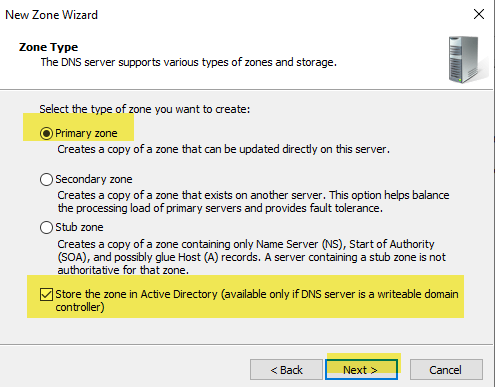
Create a new Reverse Lookup Zone

Set the Zone Type as Primary and check the box labeled, “Store the zone in Active Directory (available only if DNS server is a writeable domain controller), then select “Next”
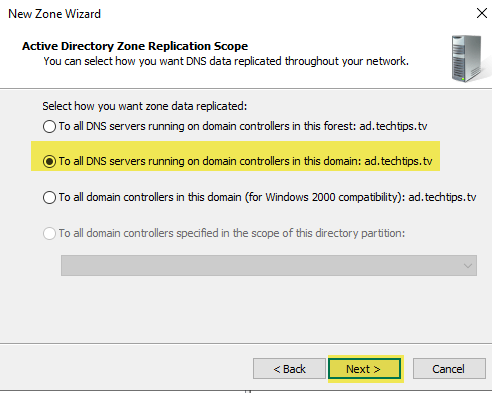
AD Zone Replication Scope: Leave the default setting “To all DNS servers running on domain controllers in this domain” and select “Next”
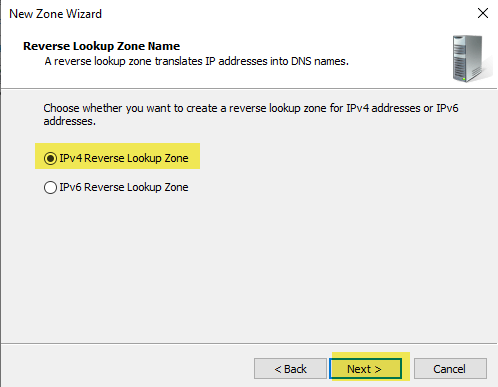
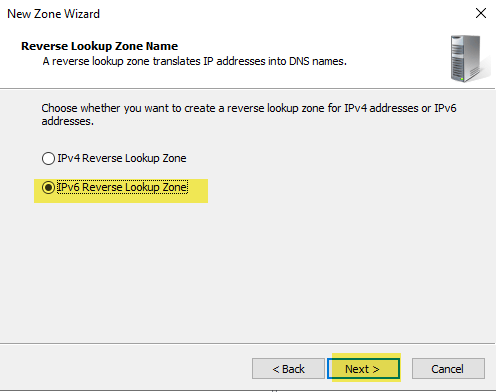
Leave the default “IPv4 Reverse Lookup Zone”
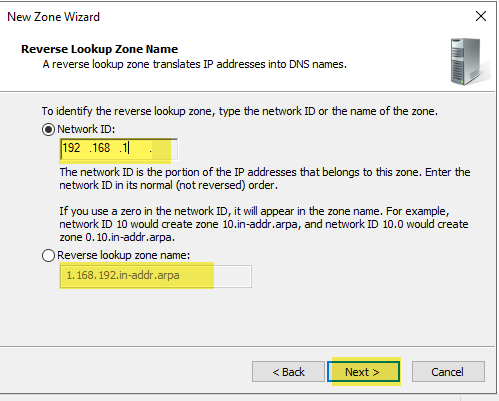
Enter the first octets of your IP network. For a class C network, you will enter the first three octets in their normal (not reversed) order. You will see the name fill in (grayed out) in the Reverse lookup zone name. Select “Next”
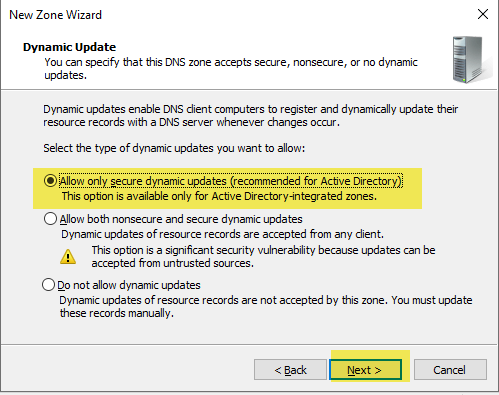
Leave the default to allow only secure dynamic updates.
Review and complete the wizard
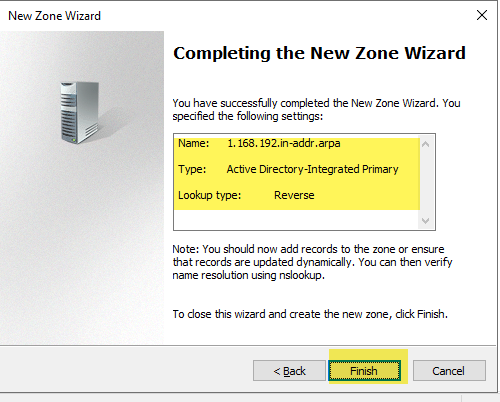
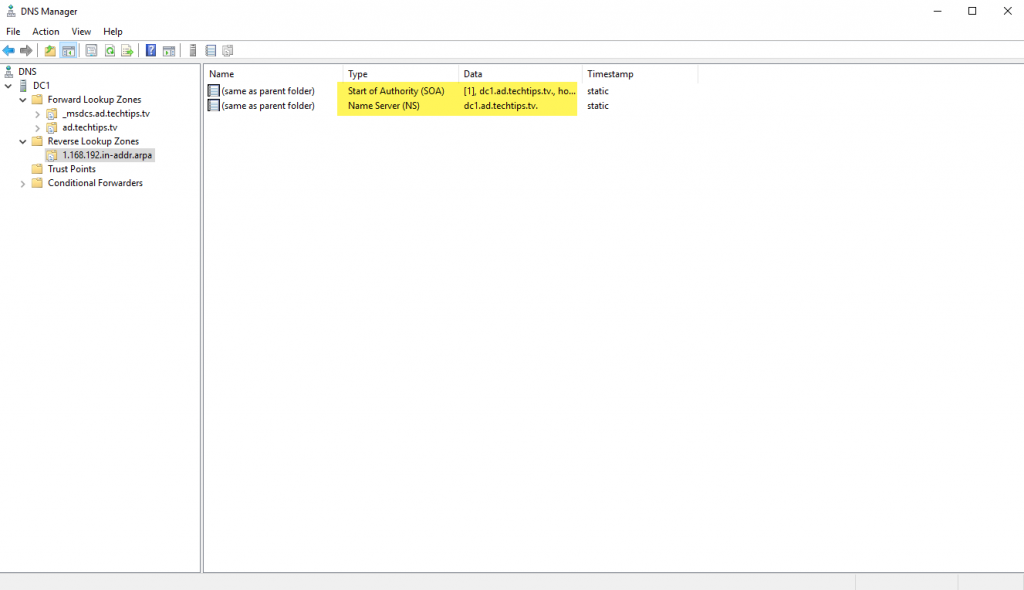
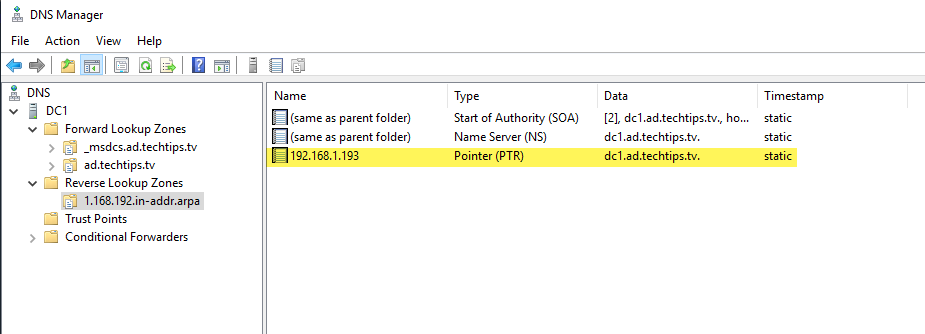
You will see the reverse lookup zone, along with its Start of Authority (SOA) and Name Server (NS) records.
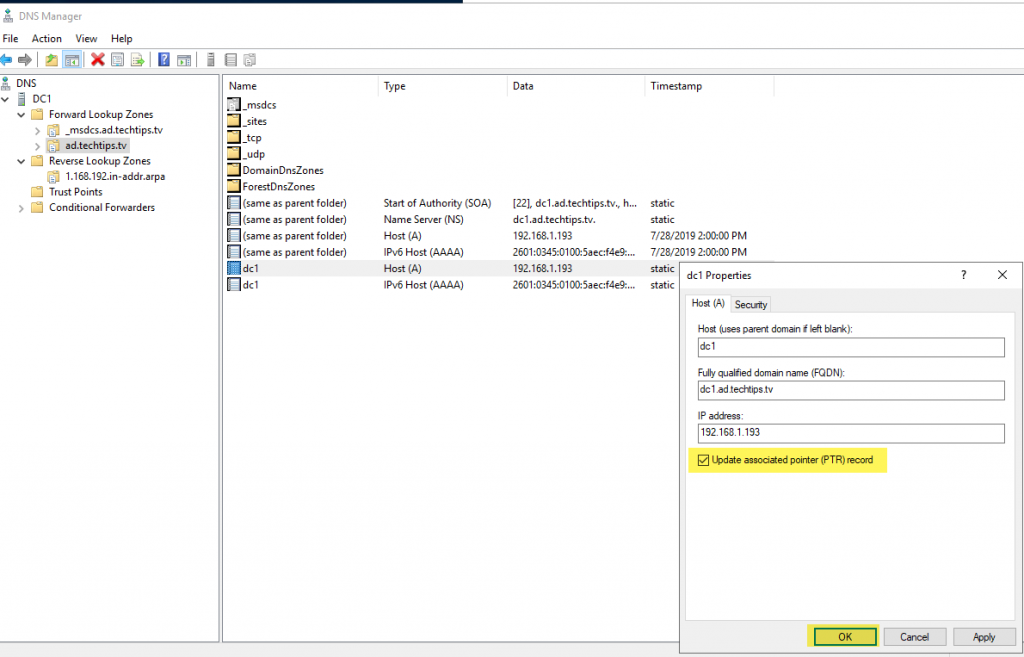
Create the pointer record for your domain controller
- Select your domain
- Double-click to select the Host (A) record with your domain controller’s IPv4 address
- Check the box to Update associated pointer (PTR) record
- Select “OK” to apply your changes and close the dialog box
Verify the reverse record updated
- Select the reverse lookup zone
- Right-click in the results window and select “Refresh”
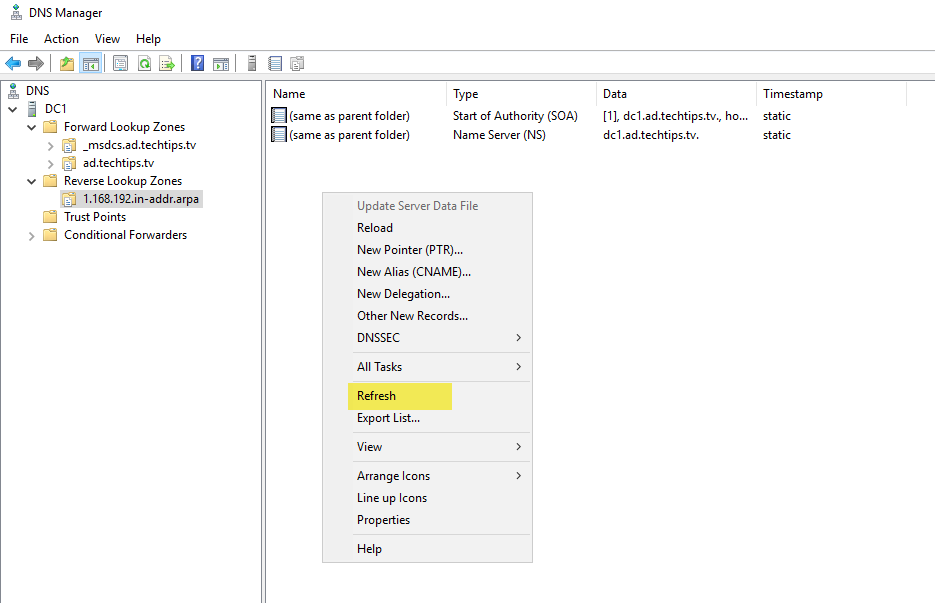
The reverse record should now display in the results window.
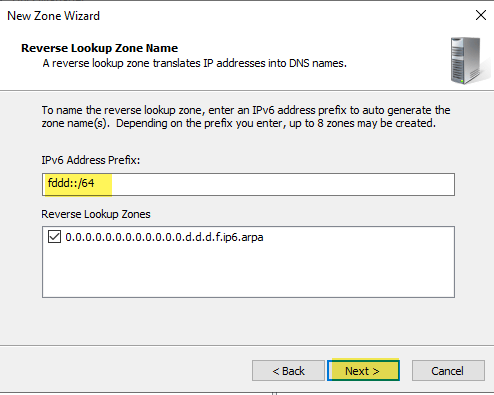
Configure your IPv6 Reverse zone following the same steps you did for IPv4. Verify your IPv6 pointer record exists. Screenshots below show the screens specific to IPv6
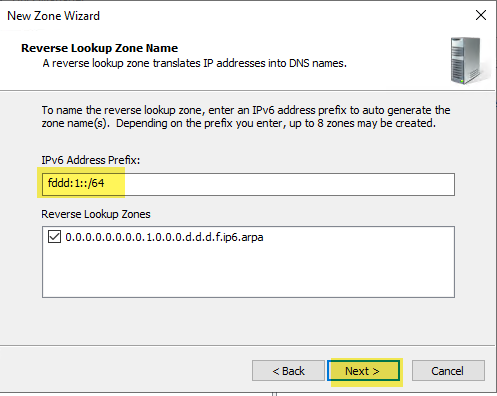
Another Example:
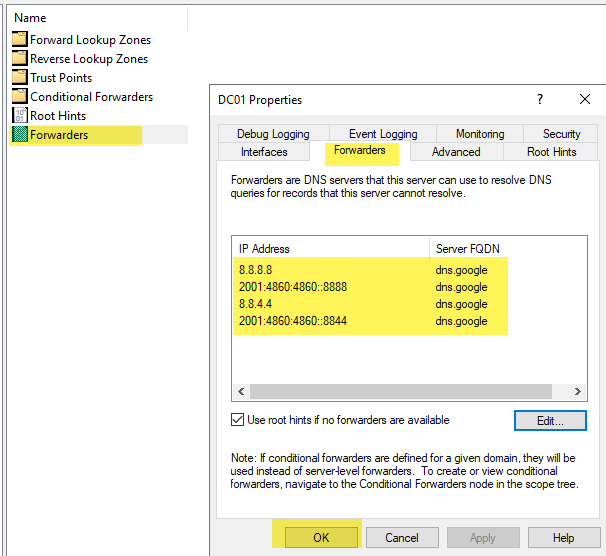
Configure your forwarders for IPv4 and IPv6. I am configuring using Google’s DNS. You may have reasons to use your ISP’s DNS or some other external DNS. If you are not sure, just use Google’s.
IPv4: 8.8.8.8 and 8.8.4.4
IPv6: 2001:4860:4860:8888 and 2001:4860:4860:8844
You can now close your DNS and Active Directory Users and Computers (ADUC) tools. Give yourself a high-five! You just brought a brand new active directory online.